Azure Web Sites includes a way to easily install a number of web apps such as WordPress, Drupal, Joomla, Orchard, and DotNetNuke. By itself, that’s a great offering. But Azure has built in a way to continuously deploy updates to your web site through TFS or Git. I’m running my blog on Azure Web Sites using WordPress and GitHub publishing and this is a walk-through of how I set that up. Follow along!
Setup WordPress
The first step on your journey to Azure WordPress greatness is to visit the Windows Azure Portal and create a new Windows Azure Web Site (WAWS). In the new website dialog, the default WordPress installation is chosen from the web application gallery.
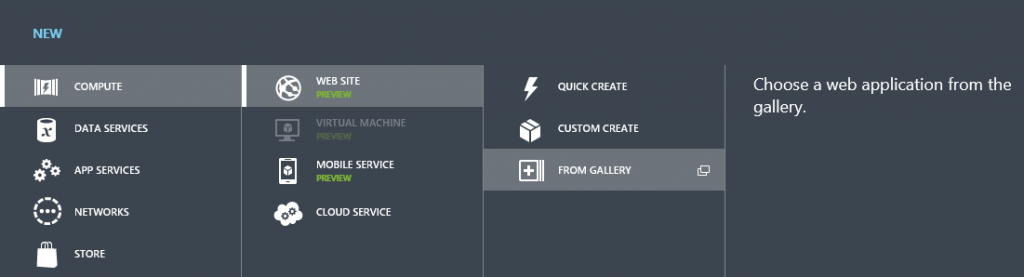
Choose the WordPress app from the list and move on. As of this writing, the WordPress version installed by Azure is 3.4 but the current release is actually 3.5. No worries, I’ll show how to go about upgrading this later.
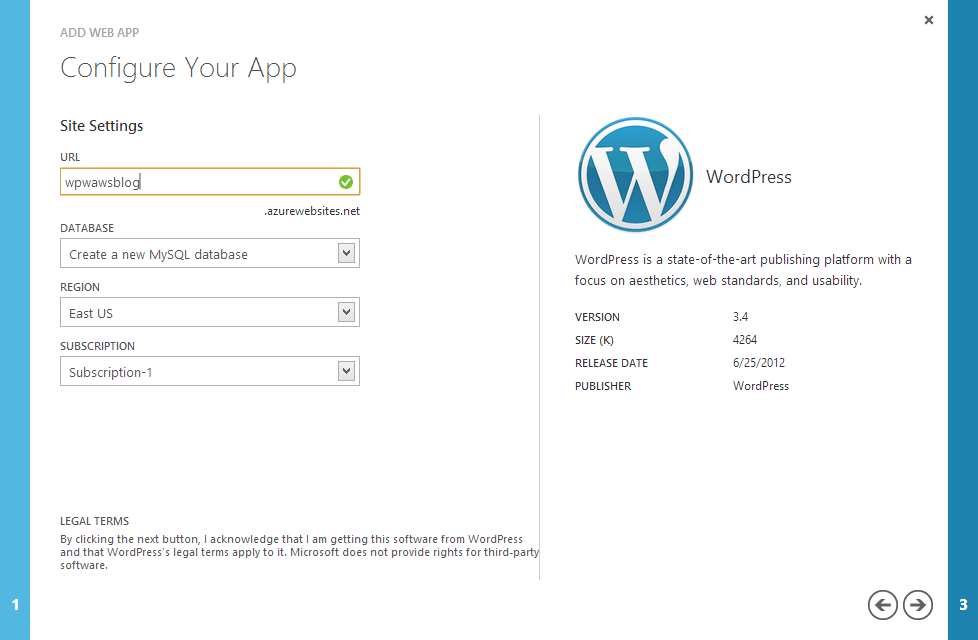
Continue through the creation process which includes a free MySQL service provided by ClearDB. Note that this free MySQL database has a size limit of 20 MB. John Papa ran into this problem one chilly Christmas morning and wrote about how to deal with that issue.
Once the site is created, hit the URL and go through the first-time WordPress setup just like a typical WordPress installation.

At this point, you could start using your new WordPress blog and go. But this post is about how to run a WordPress blog using git deployment on Azure. So let’s get the git deployment setup.
![deploy]() Setup Git
Setup Git

I’m going to use GitHub for the git service and GitHub for Windows (GFW) as the client. If you’d rather use the git command line, have at it. But then you’re probably not reading this post are you? Nope. You’re too advanced.
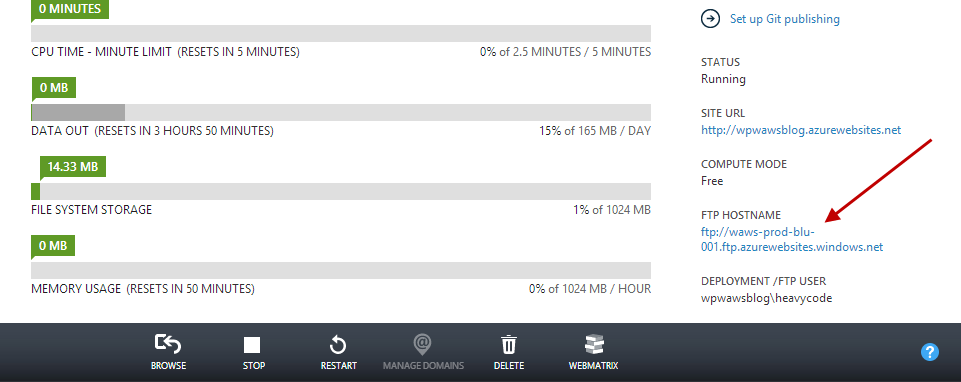
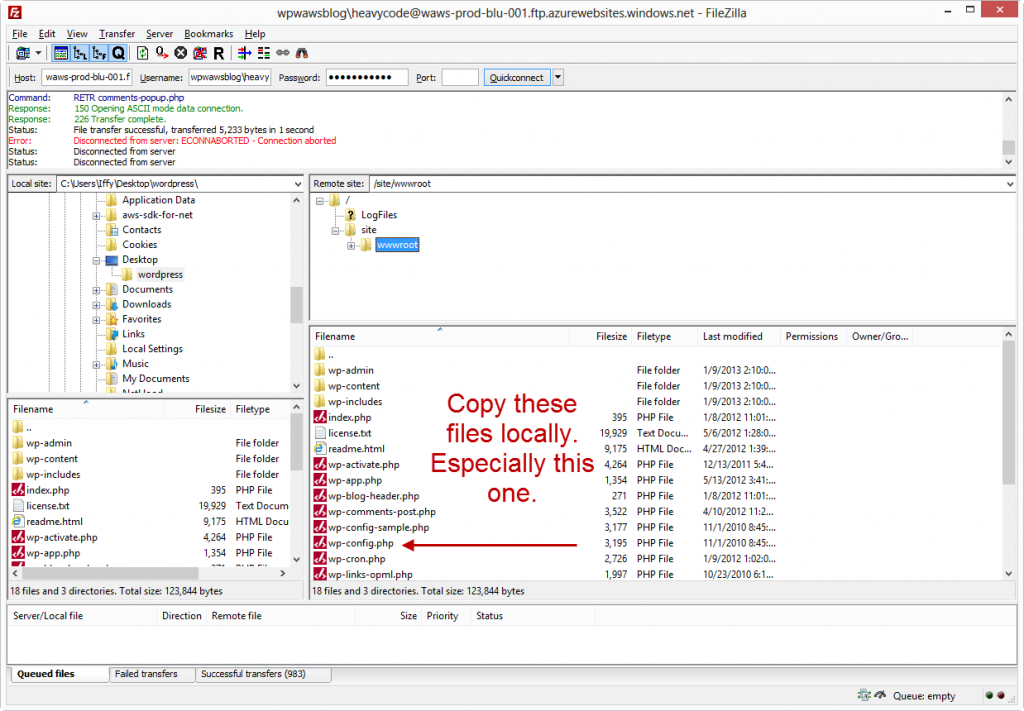
Let’s start by using FTP to pull down locally what Azure installed for us. In the Windows Azure Portal, you can retrieve the FTP path and username then use your favorite FTP client to pull the files off the server. I’m used FileZilla in this walkthrough.
I like to do this step as it gives me a baseline commit in my repository. We could go straight to version 3.5 in the git repository, but this gives me a sense of history and what Azure had in place before I started screwing around.
Using the GFW application, create the new repository by clicking “+Add” or just drag the folder you downloaded into the GFW window.
Take a look in the repository and all the files should say “new” next to them. There is one file in particular that we do NOT want to commit to the repository: wp-config.php. Windows Azure created this for us as part of the New Web Site process and populated it with our database connection info. We do NOT want this in the repository if it’s a public repository as that will just give away your database information to the world. Unless you feel like a challenge, let’s keep it out of there. If you’re using a private repository, that decision is up to you.
The easiest way to keep this file from uploading is to add it to the .gitignore file. You can edit the .gitignore file manually or use the “Settings” dialog of the repository in GFW.
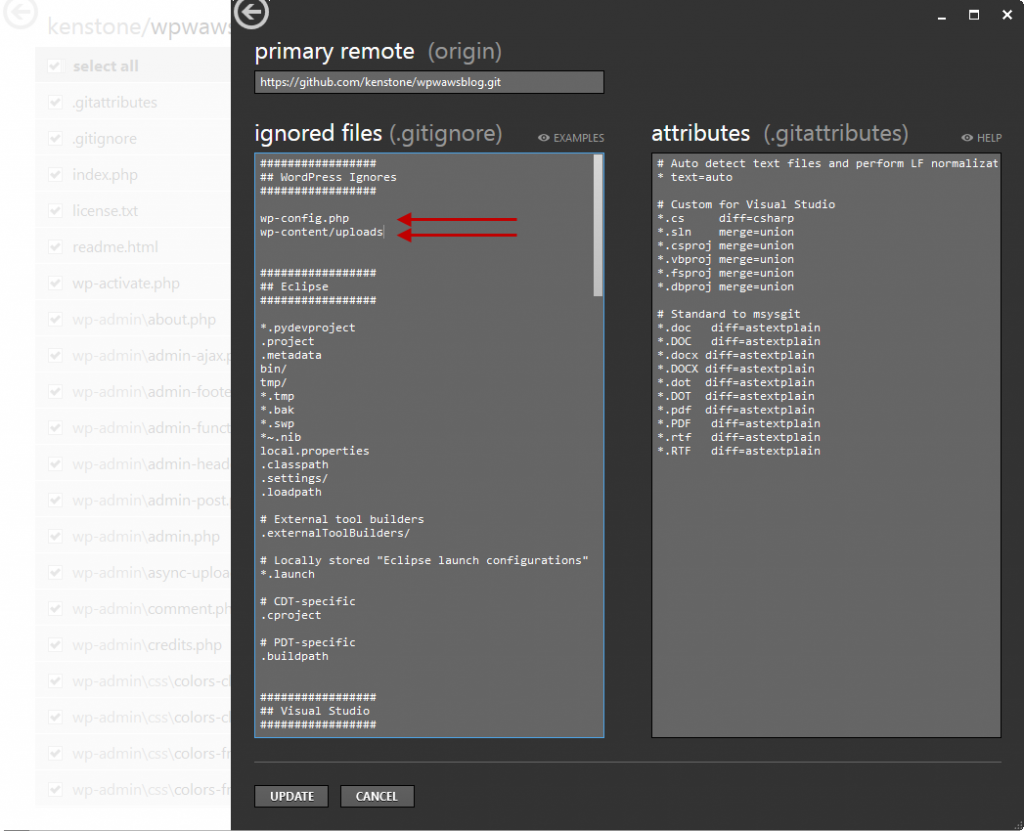
Notice that I also added wp-content/uploads to the .gitignore file. This allows you to run WordPress on your dev machine and perform uploads without those uploads following the repository around. Once you’re satisfied with the initial commit, click the “Publish” button to send it to the cloud!
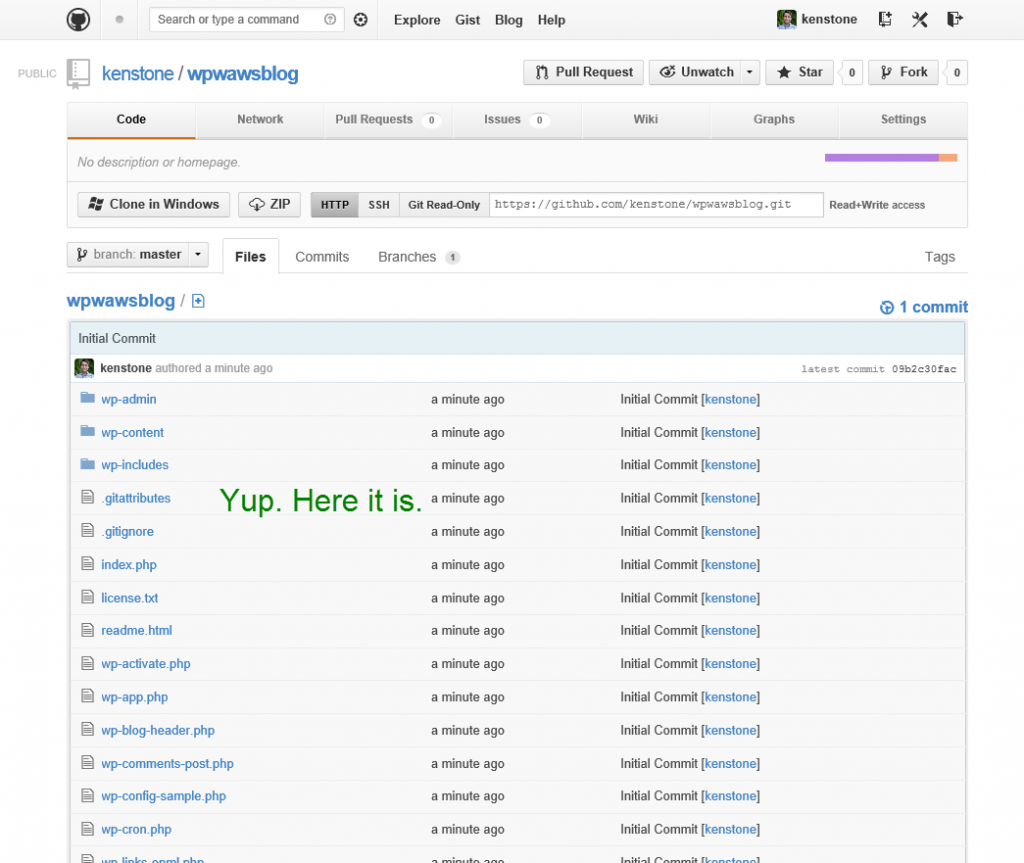
Fire up github.com to confirm that all is well.
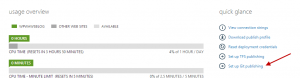
Now, move back to the Windows Azure Portal for your web site. On the right-hand size of the dashboard page, there’s a link labeled “Set up Git publishing”
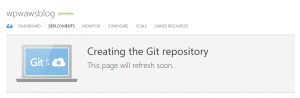 Clicking that will fire off something in Azure that will get git started. You should see this:
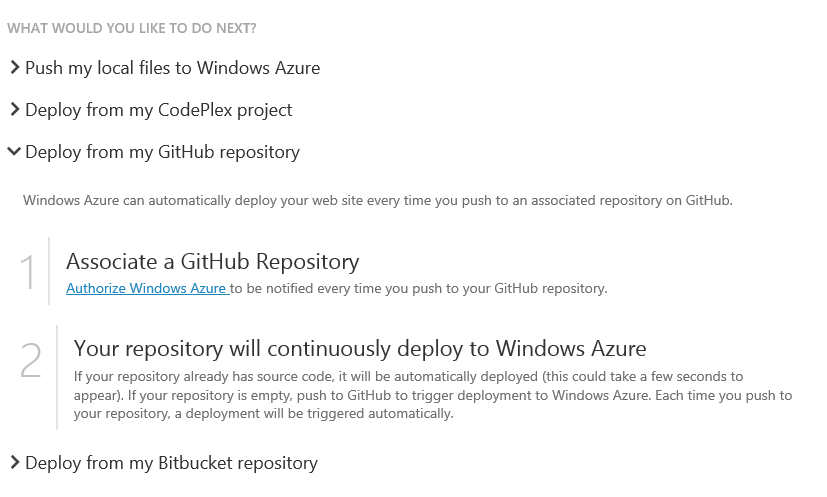
After the page refreshes, you’ll see a new page with an option entitled “Deploy from my GitHub repository”. Expand that and click on the “Authorize Windows Azure” link.
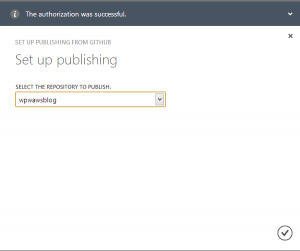
This will start an authorization process that you’re no doubt familiar with. Once it completes, WAWS will show a page asking you to pick the repository to push from. Pick the repository and continue.
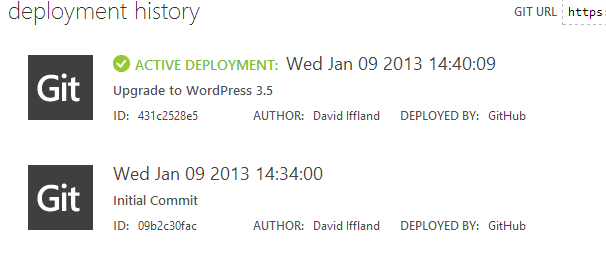
 Once this is complete, you should see this:
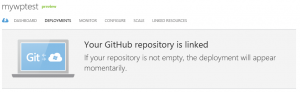
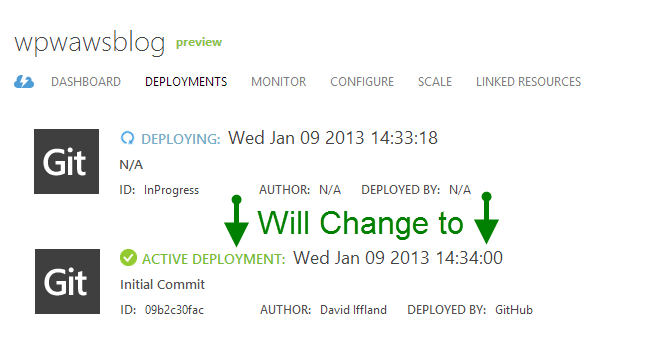
And soon after, this:
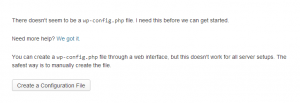 Go ahead and hit your site to make sure it’s working. What’s that? It’s not working? You got an error that says “There doesn’t seem to be a wp-config.php file. I need this before we can get started.” Ya. Me too. It’s the flaw in this process. There’s probably a better way, but I don’t know what it is. Let’s fix the problem.
This is because on the initial deployment from git, all existing files in your site are removed. Since we ignored wp-config.php from the git repository, it was removed from the deployment. But, we downloaded everything after WAWS created it, so we still have it locally. Just copy it back over to the web site via FTP the same way you downloaded it in the first place, only in reverse. Then try again.
Once this file is back in place, we’ll never have to deal with it again. It will stay put.
Hooray. We put back in Azure what was already there! Alright, let make some changes!
Update to Latest WordPress
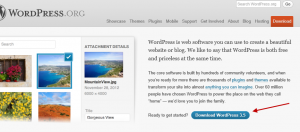 Simply visit wordpress.org and click the rather obvious button labeled “Download WordPress 3.5″. Or just point your browser to http://wordpress.org/latest.zip
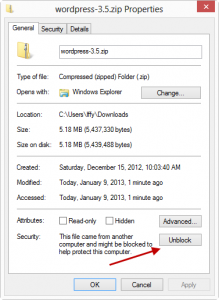 After downloading, I like to make sure the files are unblocked to make sure I don’t run into weird problems later. By doing it now, before unzipping, we’re guaranteed that the files inside won’t be blocked.
Then extract the zip file into the folder where your local repository lives. Make sure you don’t accidentally extract into a subfolder — overwrite the base directory.
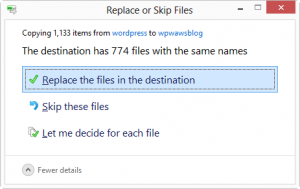
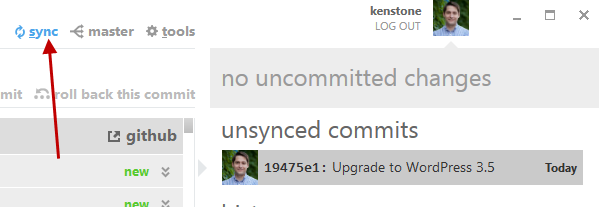
Once that’s done, open GFW back up and check out the repository. There’s now a notice that there are uncommitted changes. Click the “Show” button to see what’s changed.

Since this is a big change, there are many changes to existing files and some new files. If there’s anything in here you don’t want clogging up your repository, like the newest themes, delete the files and the list of changes will update. Add a title for this set of changes such as “Upgrade to WordPress 3.5″ and click “COMMIT”. Once this is done, the “sync” button lights up. This button is the secret sauce of GFW and makes it easy for devs not well versed in git to easily push their changes. Once you click that button, lots of stuff starts moving.
Note that in this sample, I’m publishing to the master branch. In reality, you may want to create a new local branch and commit the changes there to keep Azure from constantly updating the server. As soon as the master branch is updated, either directly or through a pull request, Azure will pull the changes and deploy to your website.
We Deployed. Now What?
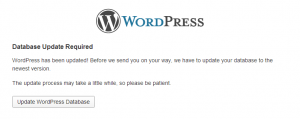 Now visit the admin section of your blog. Depending on your process, you might see a dialog that says the database needs upgrading:
Click that button and let WordPress update the database. Then, you should see the dashboard and in it you should see this little bit of information:

All Changes in Git
It’s important to note that you should make all changes to your website in the git repository rather than directly on your website. One common example of this is installing and upgrading plug-ins. You need to download plug-ins directly to your machine and commit those changes to the repository and let Azure pull the changes from GitHub. The same goes for new and updated themes.